

At a glance
NordVPN’s dedicated IP add-on suits solo freelancers, contractors, and small teams needing consistent access to IP-restricted company servers, databases, or client dashboards without triggering security lockouts or endless CAPTCHA verifications. Because it assigns a single, private IP address to your account rather than cycling through shared pool addresses, it maintains identity continuity while preserving standard VPN tunnel encryption across up to 10 simultaneous devices.
In this guide
Why Small Teams and Freelancers Consider a Dedicated IP
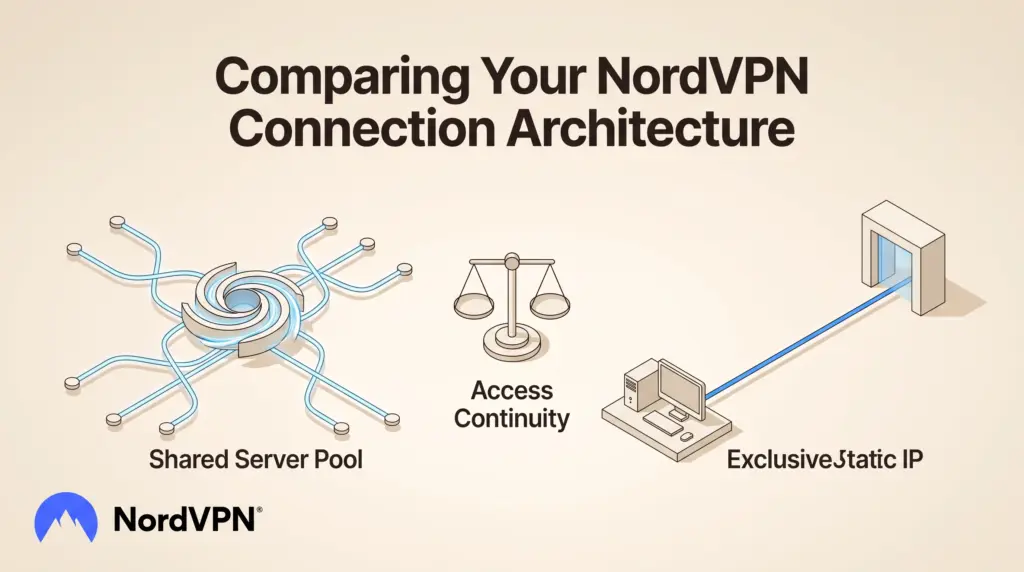
Standard virtual private network connections operate by routing internet traffic through shared servers alongside hundreds of other users. While this shared-pool architecture enhances anonymity for everyday browsing, it introduces friction for business operations. Cloud platforms, payment processors, and client hosting dashboards frequently interpret rapid shifts in shared IP addresses or traffic spikes from blacklisted shared nodes as potential security breaches.
A dedicated IP resolves this friction by assigning a static, exclusive IP address that belongs solely to your account. According to NordVPN features documentation, this static address helps maintain online reputation, bypasses shared-pool IP denylists, and enables secure connection to IP-restricted private networks. For remote freelancers who frequently sign into administrative portals, a dedicated IP reduces suspicious activity warnings and repetitive multi-factor authorization requests.
Understanding this architecture is especially relevant when assessing NordVPN for remote work environments, where public Wi-Fi security must coexist with seamless access to sensitive client infrastructure.
Dedicated IP vs. Shared VPN Servers: Architectural Differences
Choosing between standard shared VPN servers and a dedicated IP involves balancing connection stability against general-purpose versatility. The table below outlines the core technical and operational trade-offs between both routing models.
| Evaluation Criterion | Standard Shared VPN Server | Dedicated IP Add-On |
|---|---|---|
| Address Assignment | Dynamic; shared across multiple simultaneous users | Static; exclusively reserved for your individual account |
| Access Control Viability | Impractical for strict IP allowlisting due to address churn | Ideal for firewalls, staging environments, and database allowlists |
| CAPTCHA Verification | Frequent; triggered by suspicious traffic from shared users | Significantly reduced; reputation remains under your control |
| Location Flexibility | Switch between hundreds of global locations on demand | Locked to the specific city or region chosen during purchase |
| Privacy Dynamics | Blends traffic with thousands of users for higher obscurity | Consistent static footprint tied to your service subscription |
| Device Connection Scope | Included across up to 10 simultaneous devices | Usable across supported apps within the 10-device limit |
Pricing, Plan Compatibility, and Purchasing Details
The dedicated IP service is not a standalone subscription; it functions as an optional add-on configured on top of an active base plan. According to published NordVPN pricing, users can select the dedicated IP add-on during checkout across all primary consumer tiers: Basic, Complete, and Prime.
Base subscription pricing in the United States varies depending on the billing term commitment (prices stated in USD, excluding potential regional sales tax):
- Basic Plan (2-Year Term): $3.49 per month plus 3 extra months ($94.23 total for the initial 27-month period). On an annual term, the introductory rate is $5.49 per month ($65.88 for the first 12 months).
- Complete Plan (2-Year Term): $4.49 per month plus 3 extra months ($121.23 for the first 27 months). An annual term bills at $6.49 per month ($77.88 for the initial year). Includes cross-platform password management and 1 TB encrypted cloud storage.
- Prime Plan (2-Year Term): $7.49 per month plus 3 extra months ($202.23 for the initial 27-month period). Billed annually at $9.49 per month ($113.88 for the first year).
Note: Promotional rates apply only to initial billing periods; crossed-out numbers on provider checkout screens reflect standard reference points rather than guaranteed renewal figures. Users should consult the checkout summary to confirm the current add-on fee for their selected dedicated IP location and duration. For a broader breakdown of core tier structures, review our overview of NordVPN plan pricing and features.
Every standard account includes protection for up to 10 simultaneous connected devices. However, buyers must note that a 10-device limit applies to hardware connections managed by one account holder; it does not grant independent multi-seat team management licenses. Organizations requiring centralized user administration, role-based provisioning, or company billing should evaluate business-specific platforms like NordLayer rather than individual consumer accounts.
Configuration and Connection Process
Deploying a dedicated IP requires straightforward setup across supported desktop and mobile clients:
1. Add-on Acquisition and Region Selection
Select the dedicated IP add-on during checkout or purchase it directly through your existing Nord Account dashboard. You will select a specific geographic location (such as a specific city or country) for your address. Choose a location closest to your primary business infrastructure or client servers to minimize routing latency.
2. Locating the Dedicated IP in the Client
Open the NordVPN desktop or mobile client. Rather than clicking the default “Quick Connect” button—which connects to a shared dynamic server—navigate to the “Specialty Servers” category in the server sidebar. Select “Dedicated IP” to view your assigned static server location.
3. Connecting and Verifying
Connect to the assigned dedicated server. Once the encrypted tunnel establishes, verify the connection using an external IP lookup tool. Confirm that the displayed IP matches your assigned address and remains identical across subsequent reconnections.
4. Configuring Access Allowlists
Log in to your hosting control panel, cloud database, or remote server firewall. Add your assigned dedicated IP to the network security allowlist. Once saved, restrict administrative port access (such as SSH, RDP, or backend management URLs) solely to that address, blocking unauthorized connection attempts from the open web.
For direct peer-to-peer device transfers that do not require external server routing, teams can also explore configuring NordVPN Meshnet alongside their VPN workflow.
Operational Limitations and Strategic Trade-offs
While a dedicated IP solves administrative hurdles, it introduces specific operational constraints that teams must account for:
- Geographic Inflexibility: Your dedicated IP is permanently assigned to the location chosen at setup. If you need to access location-restricted resources in another country, you must switch back to the standard shared VPN server pool, temporarily leaving your static address.
- Reduced Traffic Blending: Standard VPNs mask activity by mixing data streams with thousands of active users. Because a dedicated IP is used only by your account, internet service providers and endpoints observe a continuous, static online footprint, slightly reducing passive anonymity compared to rotating pools.
- Device Limits vs. Multi-User Administration: While the base plan allows up to 10 active devices as documented in NordVPN platform support specifications, sharing a single dedicated IP across multiple remote team members requires sharing primary account credentials. This creates credential sprawl and prevents administrative access revocation when contractors leave.
Who Should Buy a Dedicated IP (and Who Should Skip It)
Recommended For:
- Freelance Developers and Web Administrators: Professionals who manage production servers, staging environments, and client databases that enforce strict IP address allowlists.
- Remote Contractors Facing Constant Verification Friction: Users who encounter continuous CAPTCHAs, automated fraud verification flags, or temporary portal locks when accessing banking or e-commerce accounts through shared VPN servers.
- Solo Operators Managing Multi-Device Workflows: Individuals using multiple laptops, tablets, and phones who need consistent administrative access across all 10 supported device slots without changing firewalls.
Not Recommended For:
- Users Seeking Maximum Browsing Anonymity: If your priority is concealing your browsing patterns entirely within large crowds of web traffic, standard dynamic shared servers are technically superior.
- Teams Requiring Independent Role Management: Small businesses with several employees needing granular credential management, activity logs, or team provisioning should look at dedicated business VPN services instead of consumer add-ons.
- Budget-Constrained General Browsers: If your workflow does not require static firewall allowlisting or administrative dashboard access, the base shared VPN plan provides sufficient encrypted protection without the add-on cost.
Next Steps for Deployment
Before purchasing a dedicated IP, inventory the digital services your business relies on. Determine whether your hosting providers, staging servers, and remote databases support IP filtering. If allowlisting is supported, identify which geographic server location best matches your team’s latency needs. When subscribing, select a compatible base plan that matches your storage and security requirements, activate the dedicated IP add-on at checkout, and assign the static address across your team’s administrative firewall rules.
Sources and further reading
Research checked 2026-10-06. Product details can change.